groov RIO, MQTT, and Ignition
Now that we have the groov RIO set up and pulling in data, the next step is to make that data useful by bringing it into Ignition. We’re going to keep it simple and use MQTT along with the Cirrus Link modules, however you can easily integrate the RIO into any MQTT architecture. We’ll save certificates and higher level security for another day as that is treated on a case-by-case scenario. If you have any questions about MQTT and security, please contact us and we will be happy to help.
This post assumes you have an Ignition gateway already set up, and the groov RIO can access it on the network.
Install the Cirrus Link Modules
First, download and install the Cirrus Link modules for Ignition. You can find more info about them on the Cirrus Link website. When downloading the modules from Inductive Automation’s website, be sure to select the version of Ignition you are using first. You will want to get the MQTT Engine and the MQTT Distributor modules.
Once you have those downloaded, login to your gateway management page, and install them on the Modules page. Once they are installed and running (use default settings for now), you can begin configuring the RIO. If you already have Cirrus Link running on your gateway, you will need to get the username/password for your MQTT server, port information, etc. and use that for the following steps.

Cirrus Link MQTT Engine and MQTT Distributor modules running on an Ignition Gateway
Enable MQTT on the groov RIO
Next you want to go back to the groov RIO configuration page, and click the “MQTT” button on the home page. On this next page you will be able to add in the MQTT Broker, devices, and enable MQTT on the RIO.

The MQTT configuration page in the groov RIO
Click on the “MQTT Configuration” section to start configuring the MQTT settings. First, you will want to set up the MQTT device information. For this post we are keeping it really simple and selecting “MQTT with Sparkplug Payloads”. This will automatically create the tag structure for us in Ignition.
You can then set up your Group ID and Edge Node ID so you can easily identify this individual RIO in Ignition.
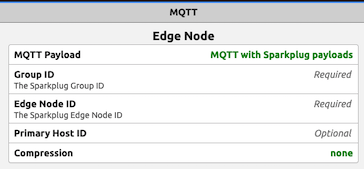
For this post, we will just set the Group ID as CorsoSystems, and our Edge Node ID as Rio-HQ. This will define the folder structure in Ignition.

Next we will add an MQTT broker, which in this case will be our Ignition gateway. Click the “Add MQTT Broker” button to open the configuration screen.

Here you will enter the IP address of your Ignition gateway with the port specified in the MQTT Distributor settings. You can enter whatever you like for the Client ID. Using the defaults, the username will be “admin” and the password will be “changeme” both without quotes. If you changed these in the MQTT settings on the gateway, use those settings here instead.

Once you have added the MQTT broker, we will set up the device. To do this click the “Add Device” button.

When you set up your device ID, it will create the lowest level folder in Ignition containing the tags. For this post we will call it HQ-RIO.
Click Save and you are good to go.
Configure the groov RIO’s I/O Channel
Now that we have MQTT set up on the RIO, we need to apply it to the channel to get data flowing. To do this, go back to the home page on the RIO, click the “I/O Channels” button, select your channel, then click “Configure”.
At the bottom, you will see “Public Access”. Turn on “Value Read” to enable the channel for MQTT data. You can adjust the deadband, as well as include the min/max and quality in the MQTT stream. You can also make the value writeable using the other sliders.

Click save on the upper right, and that is all you need to do.
See the Data in Ignition
Now, open up your Ignition designer and look at the tag browser. You should see the folder structure lining up with the settings you configured earlier, with data flowing across.

Next Steps
Now, you have MQTT data flowing from your RIO to Ignition. In the next post we will cover how to configure NodeRed on the RIO for more advanced control functionality. We will also set up PID loops on the RIO itself, set up a split time range proportional controller using NodeRed, then look into the various VPN options available on the RIO to allow for remote access into your facility, all on a single device!
Thanks for sticking around to the end, and if you have a groov RIO, any other Opto22 products—or have any questions on anything related to the topics discussed, please contact us!