The Corso Systems Build-A-Thon Experience
By Adrienne Harvey, Systems Engineer

On the Sunday before ICC Elevate, the Corso Systems Build-a-Thon team members arrived one by one at the Sacramento Airport. We couldn’t have imagined the adventure that Monday morning would bring.
Preparing and Training for Build-a-Thon 2023
As a team, we began preparing for the in-person ICC2023 Build-a-Thon event weeks ahead by reviewing the 2019 and 2022 videos in detail and discussing our observations and personal strategies. We each brought a variety of different experiences and skills to the table. I was thrilled to be on a team with William Bohn and Marguerite Daw—two of our most senior Senior Systems Engineers to create a project from scratch in just a few days. I expected to learn a lot—and did!
At different times in the past year, Marguerite and I had both visited Temecula, CA for Opto 22’s Premium Factory Training class. We were excited to see if that might give our team an edge. Ignition Partner, Opto 22, developed the panels we’d be working with during the challenge. While we knew these panels would be incredibly cool, our speculations ran wild as to what we’d actually be working with—it was a well guarded secret. After seeing the teaser video from Inductive Automation before the event, we debated if the “golf ball focus” hinted at the ICC golf tournament, or if the Build-a-Thon challenge would somehow involve golf balls. I hoped we’d be working with some kind of marble run, but with golf balls so they would be more visible from the stage.
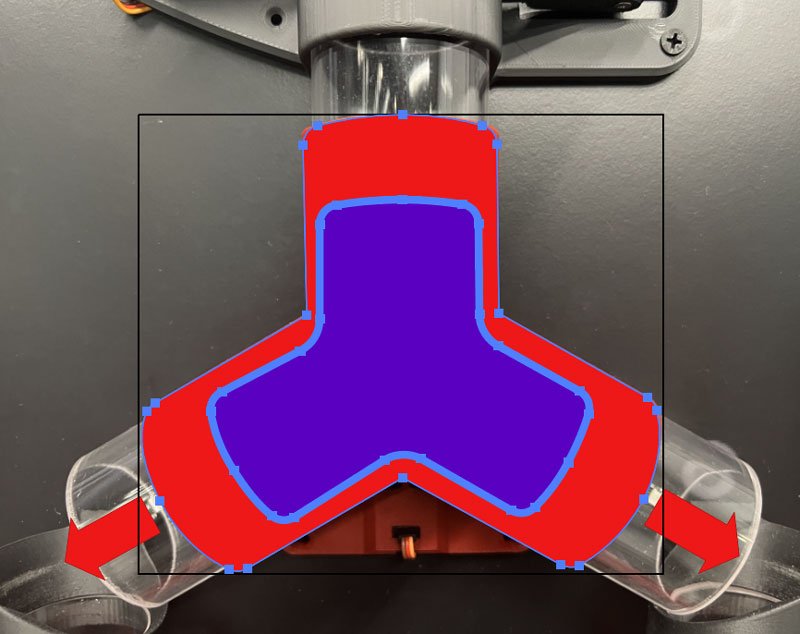
Earlier in the year, I had also taken the live online version of Inductive Automation’s new Ignition Perspective Training Course and can happily report that this course helped me contribute to our team. The course increased my overall familiarity with advanced uses of Flex containers, and how to nest them effectively. Between the course and my experience working on several Ignition projects that leveraged parameterized views nestled into stacked and nested flex containers, I was able to help get our main live page up and ready for data fast. The one piece of non-Ignition software I used was Adobe Illustrator, as the Adobe suite has been a huge part of my life for years. I took a quick photo of a gate on the Galton Board (more about this later) and created a hand traced simplified SVG version of it that could dynamically display the data from the Opto 22 groov EPIC. Needless to say, to prepare for Build-a-Thon, I reviewed my notes from Inductive Automation’s Perspective training, especially after they emphasized we’d would specifically be working with Ignition Perspective during the challenge.
Senior Systems Engineer, Marguerite Daw has worked at Corso Systems for over five years and prepared for the Build-A-Thon with a detailed look at the Required Skills page. She reviewed how she’d used those specific skills—including projects she’d completed for Corso Systems customers, and past Ignition Certification projects. However, practice does make perfect, so she found that practicing building a few things in Perspective before the event was especially helpful.
William Bohn, Senior Systems Engineer (and Corso’s very first employee) prepared by going through the Ignition Exchange in detail to make note of any new or special Exchange resources we might be able to use in the project. (Build-a-Thon rules allowed us to use any of the public resources on the Ignition Exchange, so it was absolutely a great plan to check through and try a variety of resources before the event). William also began creating a general collaborative “game plan of attack” on our shared Asana account that we could use—regardless of the actual project. Marguerite and I jumped in to continue adding structure and strategize how we would want to approach a project in such a limited time period. I was thrilled to see how these two senior engineers mapped out exactly how they would want to approach a rush, high pressure, limited time project!
Build-A-Thon Day One: The Final Challenge is Revealed
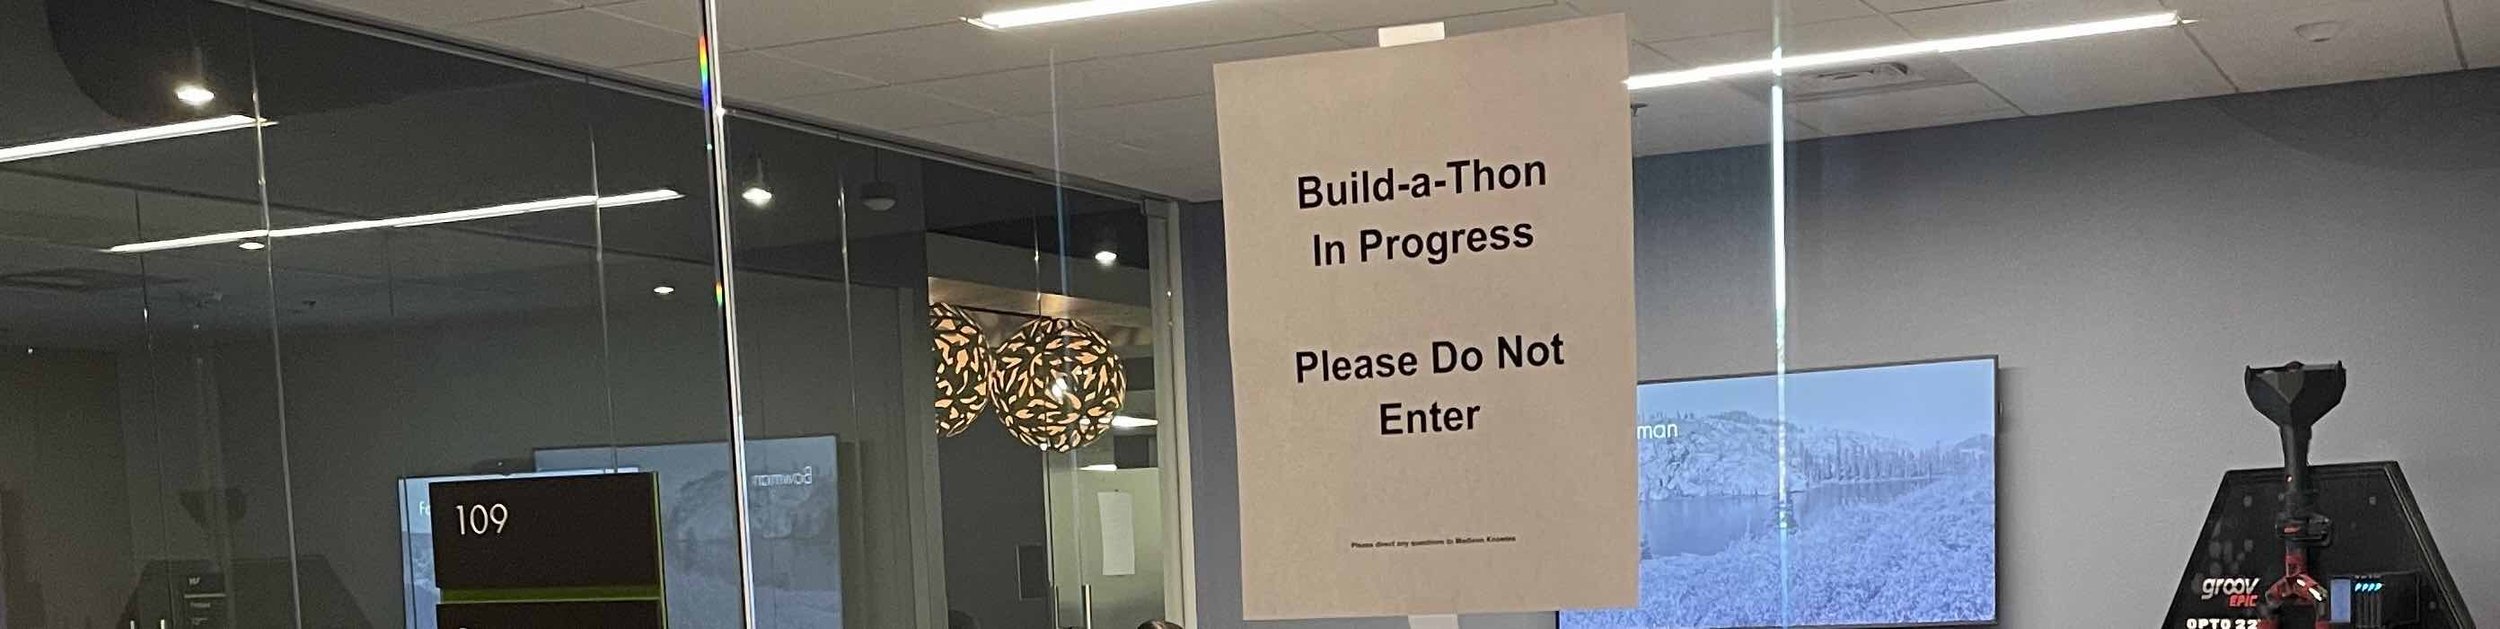
After a tour of the Inductive Automation offices we went to an upstairs conference room with our fierce competitors, the team from BW Design Group. Finally, we would learn what Opto 22 had built for the challenge—and end weeks of wild speculation!
The ever-inventive team at Opto 22 created two HUGE panels, both controlled by individual groov EPICs and covered with LEDs, custom 3d-printed parts, sensors and servos. We were immediately thankful that Terry Orchard would be on hand to make sure these complex creations kept working smoothly during the challenge. He was prepared with know-how, small software improvements (that he rolled out in real time to both teams), replacement parts when necessary, along with a couple of screwdrivers, metal files, and maybe a bit of sandpaper too.

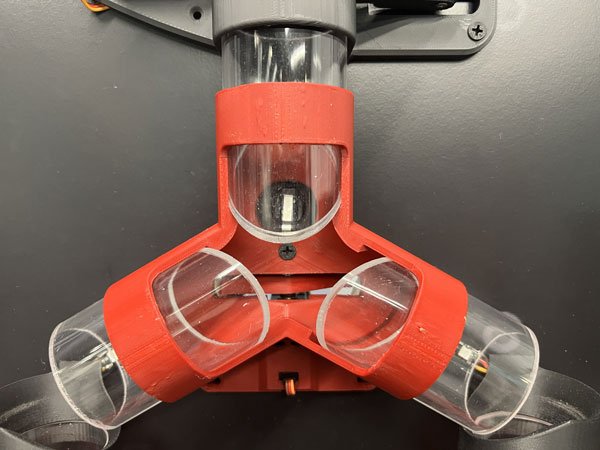
Each panel had a large funnel-like 3d-printed hopper with 32 golf balls at the very top of each panel. With the aid of an agitator and servos, it could drop a single golf ball to a chamber with a color sensor. Next, another servo-controlled flap could open to drop a golf ball through the first gate where it would clatter along the way to one of six destination tubes. The controller could also open both servo controlled “valves” on either side of the color sensor chamber and let everything go at once in “Chaos Mode”. While they weren’t especially loud on stage, in an office setting—even in large conference rooms—the sound of clattering golf balls was intense! Astute observers will note that Opto 22 had made two gigantic Galton boards!
The Opto 22 Galton Boards
We were all delighted to watch the Opto 22 team demonstrate the panels. I couldn’t wait to examine the 3d printed parts—it was obvious that Opto 22 had put in a lot of work. And while these custom panels could function as traditional Galton Boards, there was a twist: instead of stationary pegs or routes for the balls to fall through, the servos and sensors Opto 22 added allowed us to control the routes.
What is a Galton Board?
Traditionally, a Galton board is a board or box with an array of stationary pegs in a triangular pattern. When a bunch of ball-bearing-like beads, balls, or in some cases “beans” (this apparatus is sometimes called a “bean machine”) bounce off the pegs starting at the top of the triangle, they traverse a random path, but collect at the bottom in a normal distribution (AKA, the Bell Curve or Pascal’s Triangle).
Opto 22’s Galton Board 2.0
Since Opto 22 was involved, we all knew these wouldn’t be normal dusty old Galton boards! As mentioned before, just below the funnel was servo-enhanced chamber with a color sensor. Also, each “peg” was instead a fully controllable gate with a sensor (to count the # of golf balls as they entered the gate) and a servo-controlled physical switch with three positions: neutral (the servo arm extension was out of the way, so the ball would randomly fall out of the left or right side of the gate), blocking left–the ball would fall out the right side, blocking right–the ball would fall out of the left side.


The board’s interactive LED lights were also customizable and controlled from the Opto 22 groov EPIC. The lighting on each gate corresponded to the position of the gate. If the right side was open, the right side of the gate would light up blue, similarly, if the left side was open, the left side would light up green. When the whole board was set for a fully random run (all gates in neutral) also known as “Chaos Mode”, every light on the board illuminated with a bright but ominous red! Each of the six “destination” tubes were lined with a strip of LEDS which could also be controlled and modified from the groov EPIC.
Team Corso’s First Impressions
I was thrilled to see something marble-run-adjacent, especially since it was equipped with sensors, servos, 3d printed parts, and lights–and we could control the gates! Not to mention the incredibly noisy (but fun) “chaos mode”! Marguerite immediately recognized that it would be fun to model. William was all business. His first thought was, “Ok, where’s the IO list?” While everyone else was patiently following along with Travis and Kevin, he was skipping ahead in the specs the second the panel was revealed!
The Project Description and Rules
In short, we were tasked to create an Ignition project that would both control and gather data from these incredible next level custom Galton boards built by Opto 22.
“Your task is to create an Ignition Project that allows an operator to control the Galton Board and record history and statistics of each run. We have provided a groov EPIC PLC that provides all of the tags. You need to allow a user to choose between chaos mode and at least one custom mode you build using the specific mode”
Chaos Mode: original Galton board function, all gates are neutral position and the golf balls fall randomly to the left and right
Specific Mode: A mode of our design, where we choose the path - could be for one ball at a time or all 32!
…and by the way, we’re going to throw a curveball at you on stage!
Inductive Automation’s official video of the Build-a-Thon rules and regulations
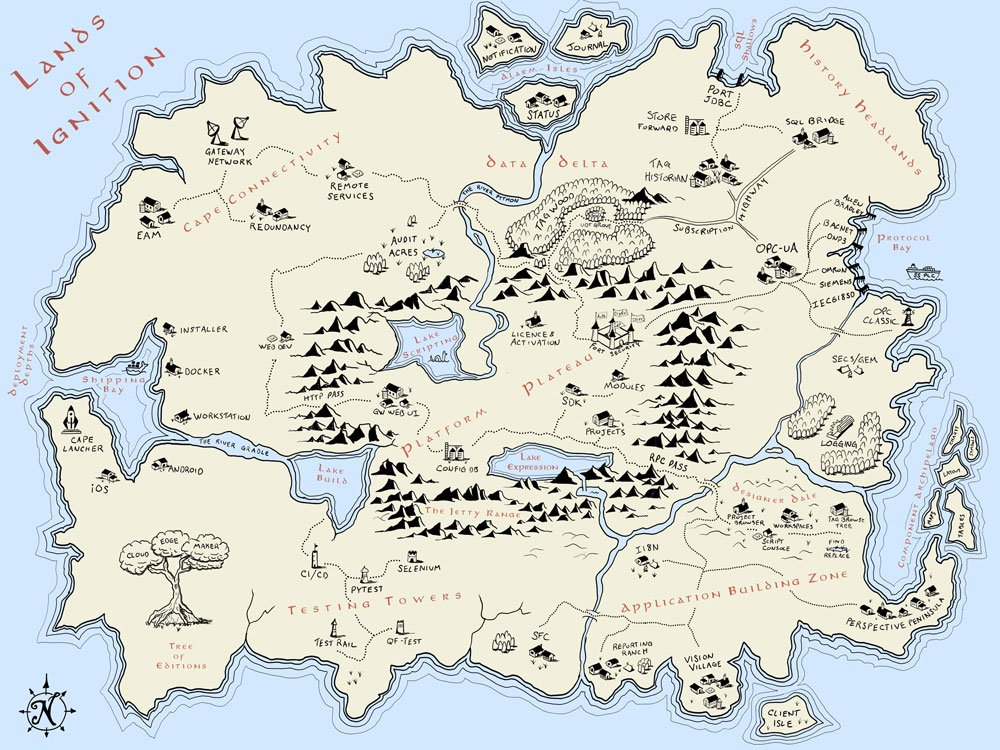
We noticed that Inductive Automation seemed keen to ramp up the surprise, suspense and entertainment factor of the Build-a-Thon this year. I even heard someone name a show that I also like to watch: Lego Masters! And as anyone who watches knows, in Lego Masters they love a theme and they love a story. Considering that we were already pretty obsessed with the “Lands of Ignition Map”, we wanted to figure out how to pull the theme together and tell a story with our project.
Determining a course of action…
Wait, how does this cool thing work?
Once we were whisked away to what would be our office home for the next two days, we immediately began testing, poking, and prodding the Opto 22 board to figure out all the features we could possibly use in our project.
We also wanted to make sure we fully understood the way everything worked.
William dug right in to understand the tags and how to control the board. We were initially worried that we may have spent too much time on coming up with a first approach (which was soon abandoned) and exploring the board. After the build was complete, we learned that the other team felt similarly!
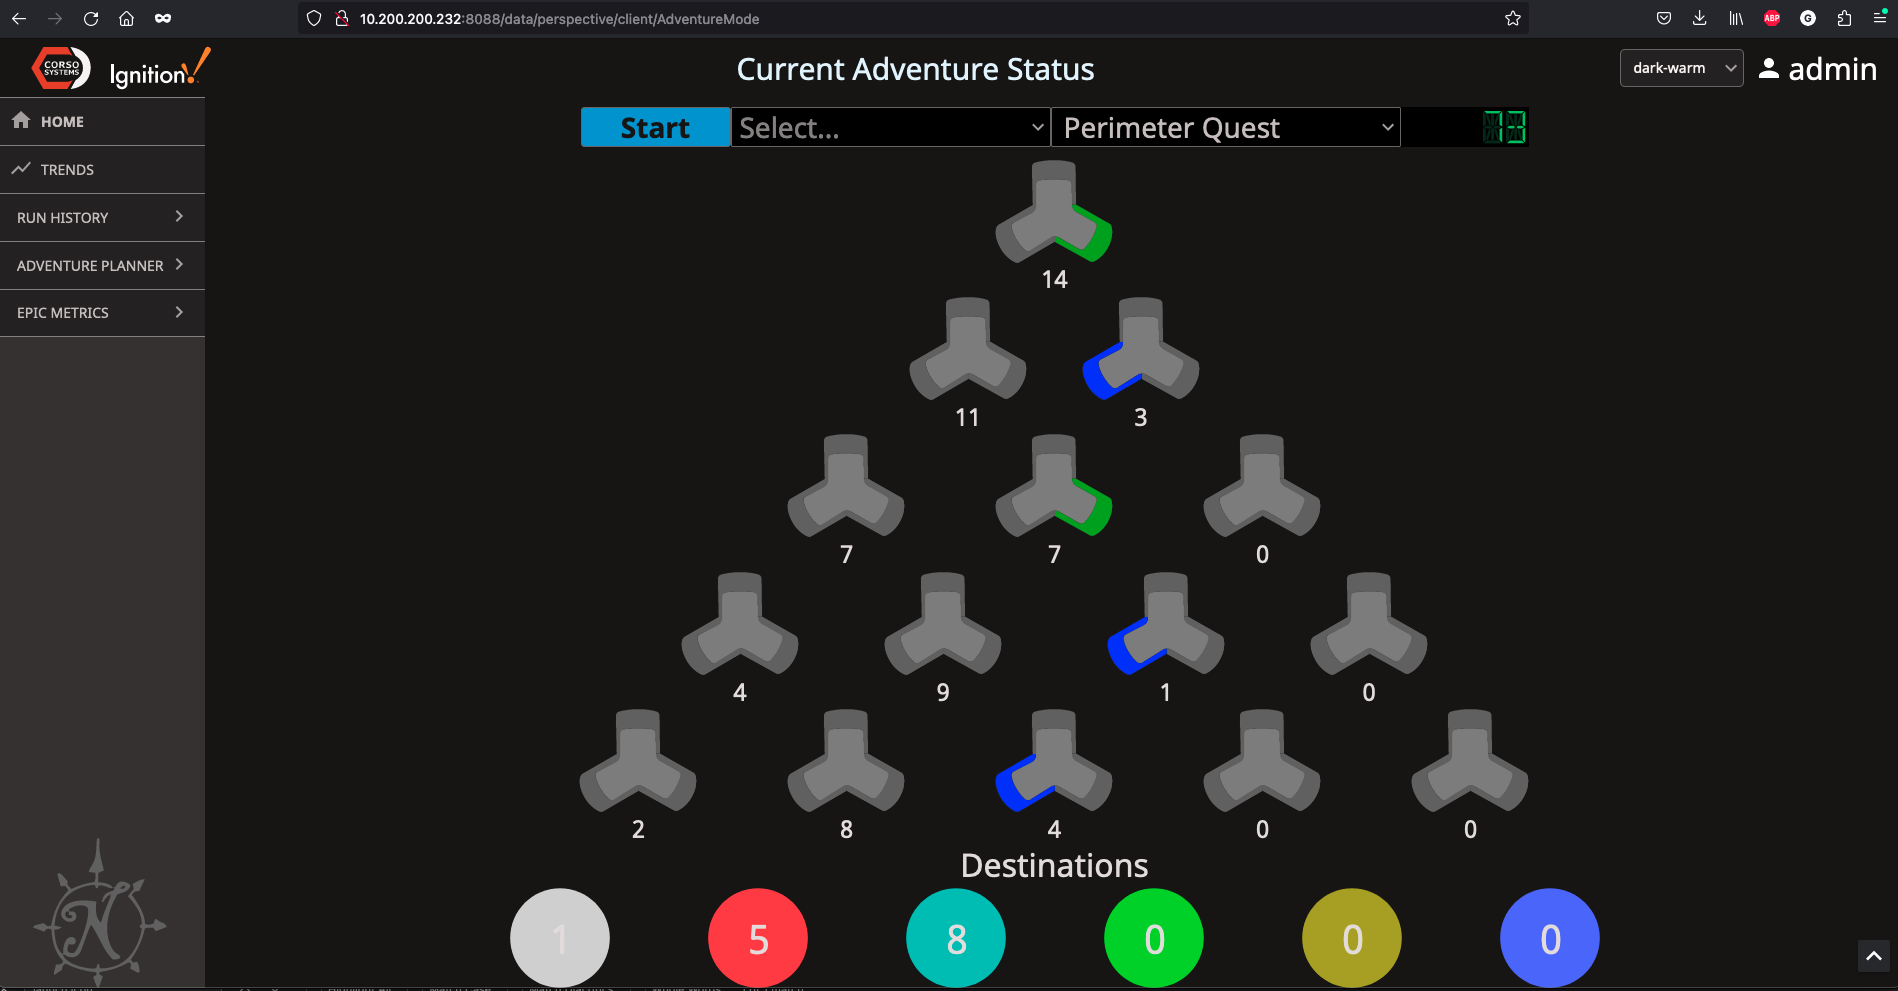
What We Made: Adventure Mode
Chaos Mode / Adventure Mode
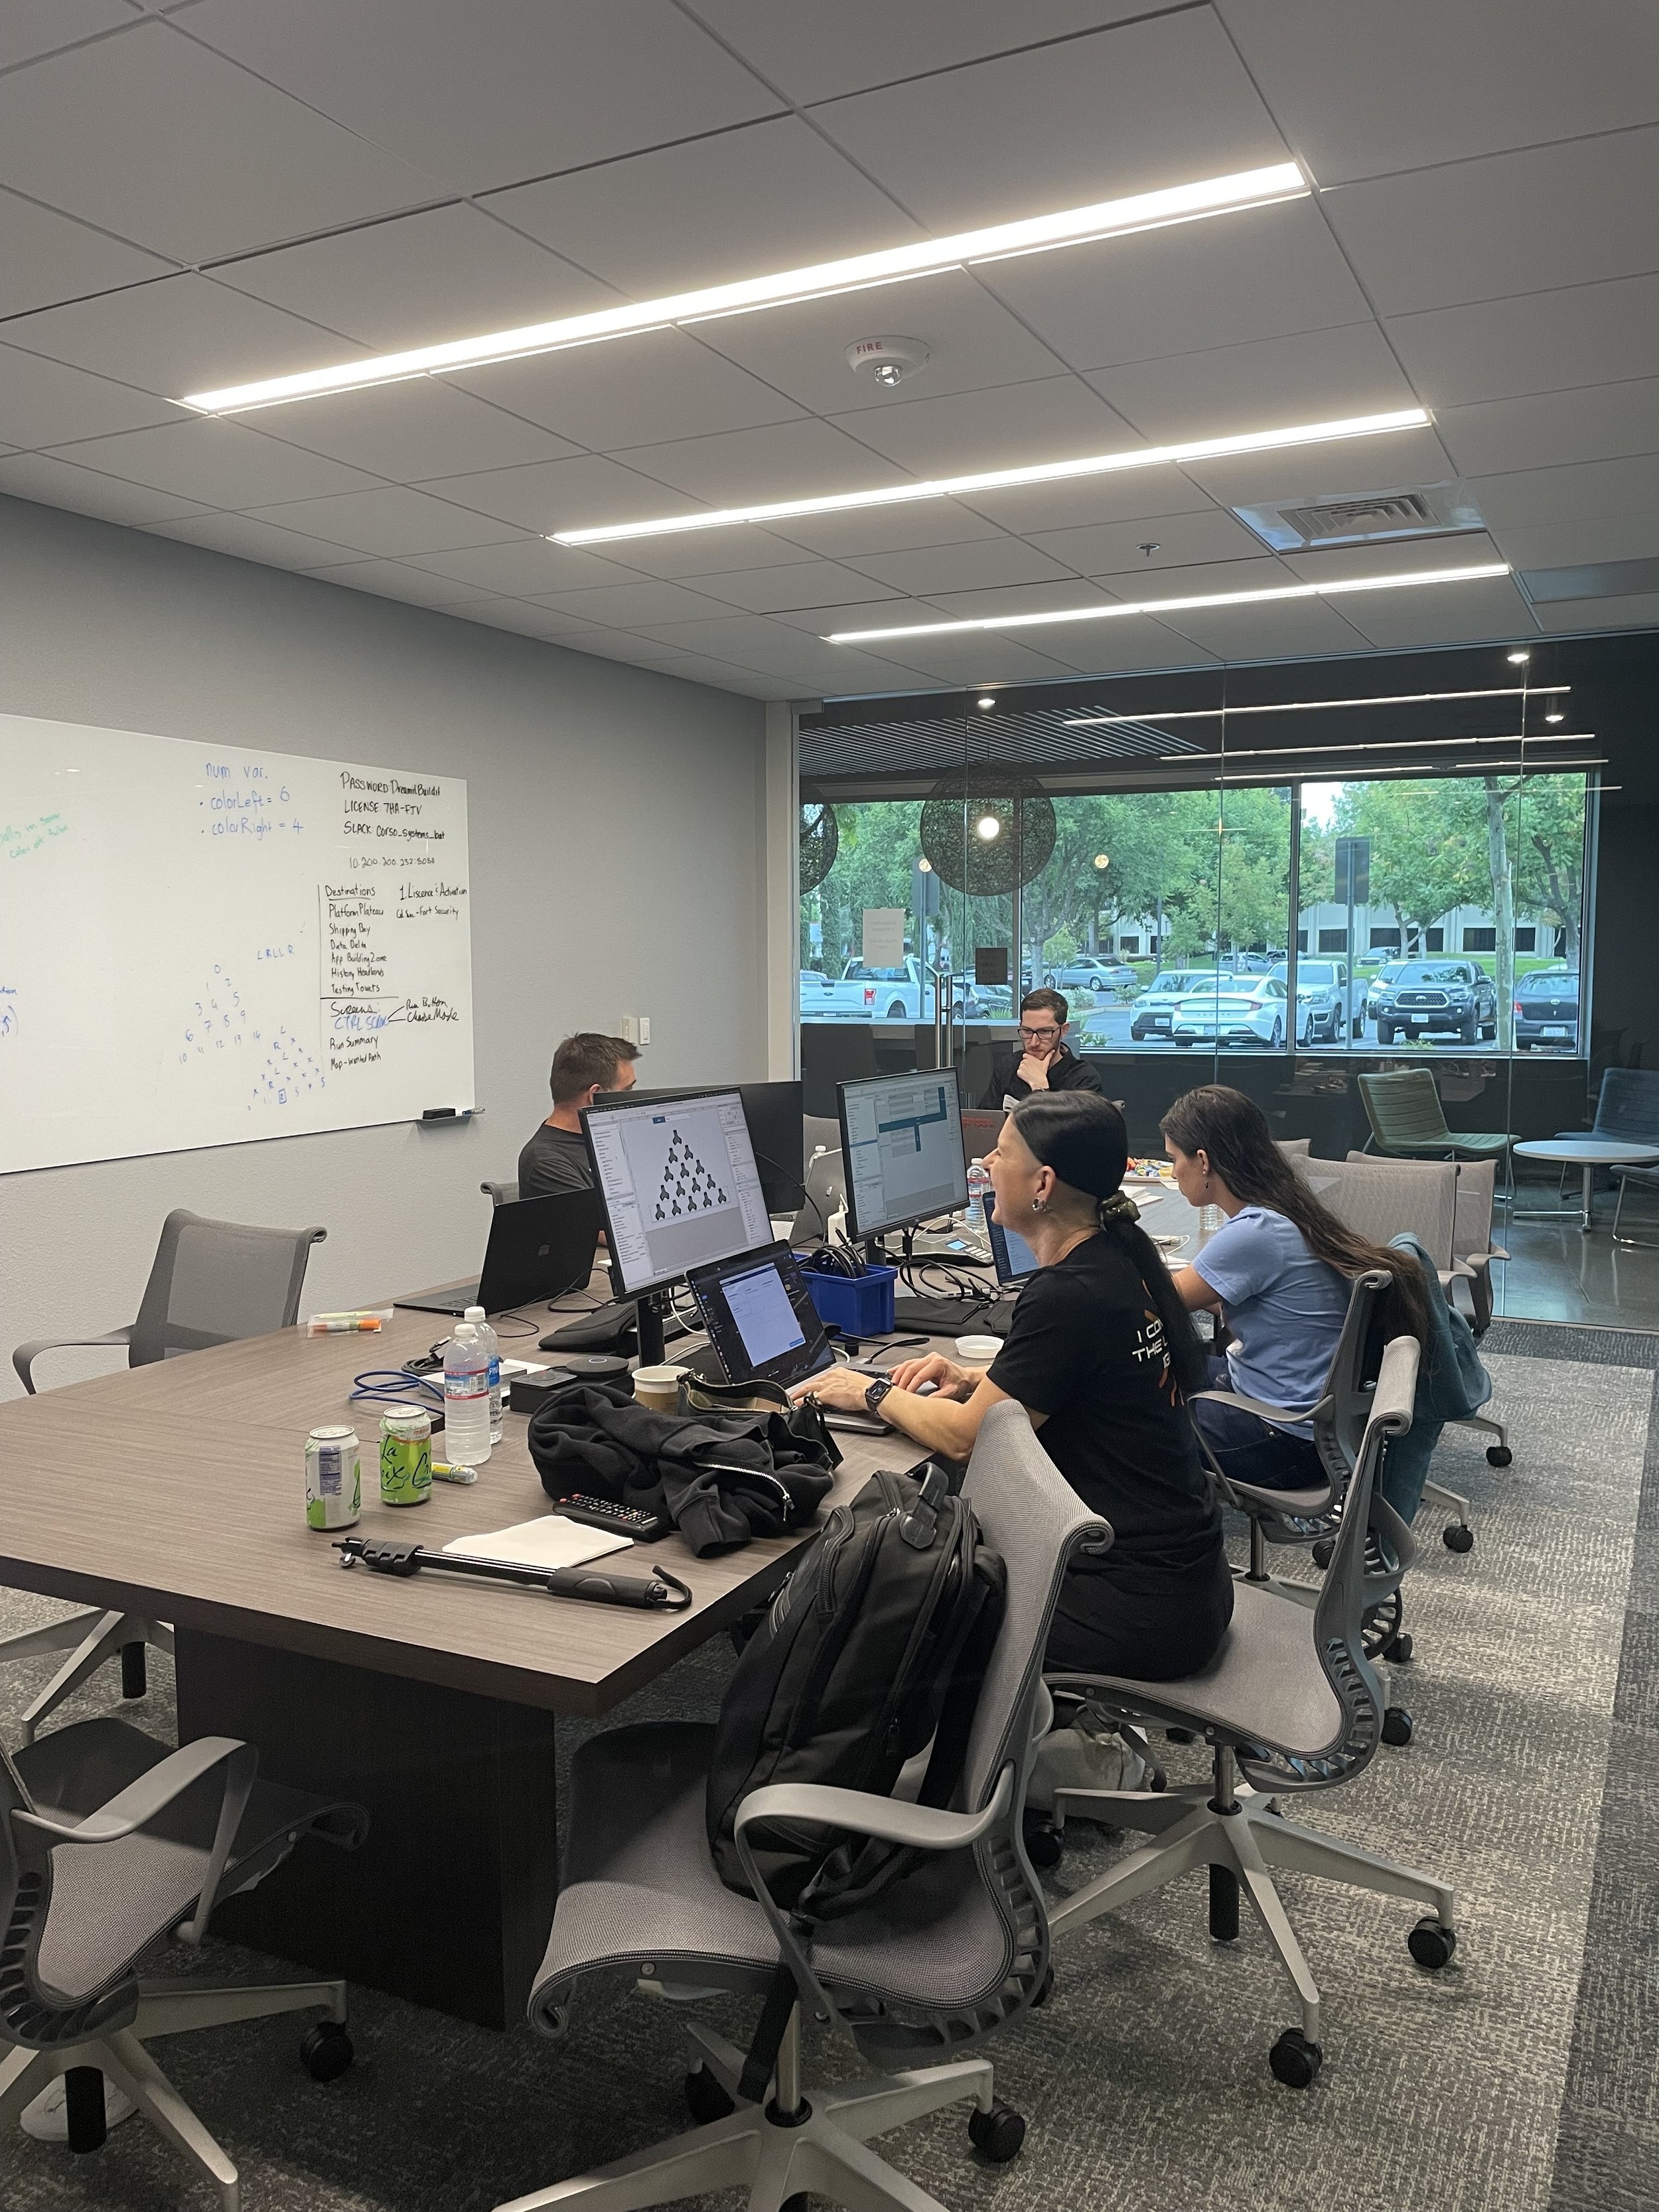
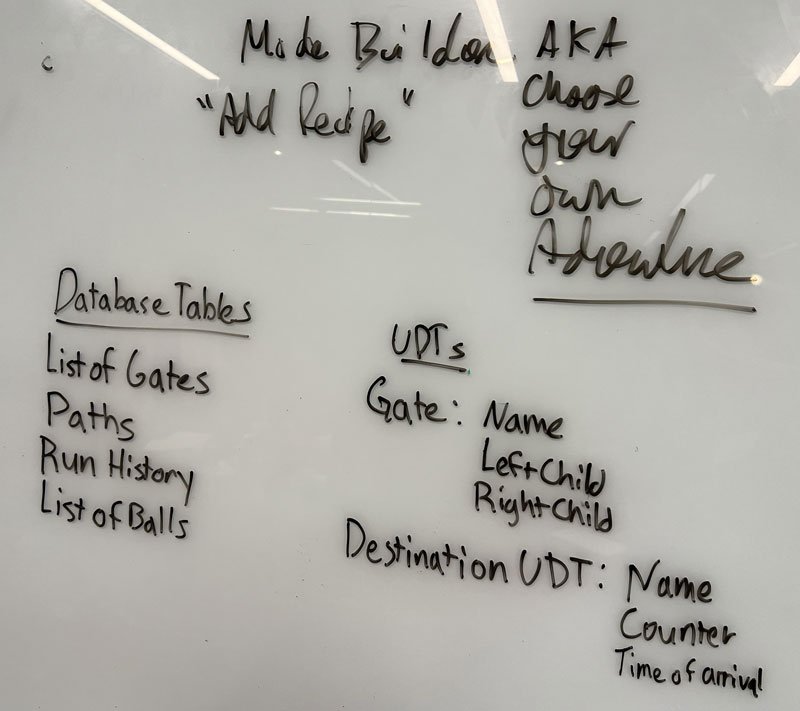
We tore into the project requirements and made them into Asana tasks—we also started scribbling all over the whiteboard. Terry of Opto22 came in at some point and drew out a diagram that was shared with both teams.
We also needed to set up our Gateway, I handed over my work PC and kept going on my Mac while William set up the Ignition Gateway on the PC as quickly as possible. We chose to use a Postgres database for our project as it’s become the defacto standard mostly because of its JSON functionality and documentation. Inductive Automation provided a temporary license for our gateway as well as for any other modules we may need.
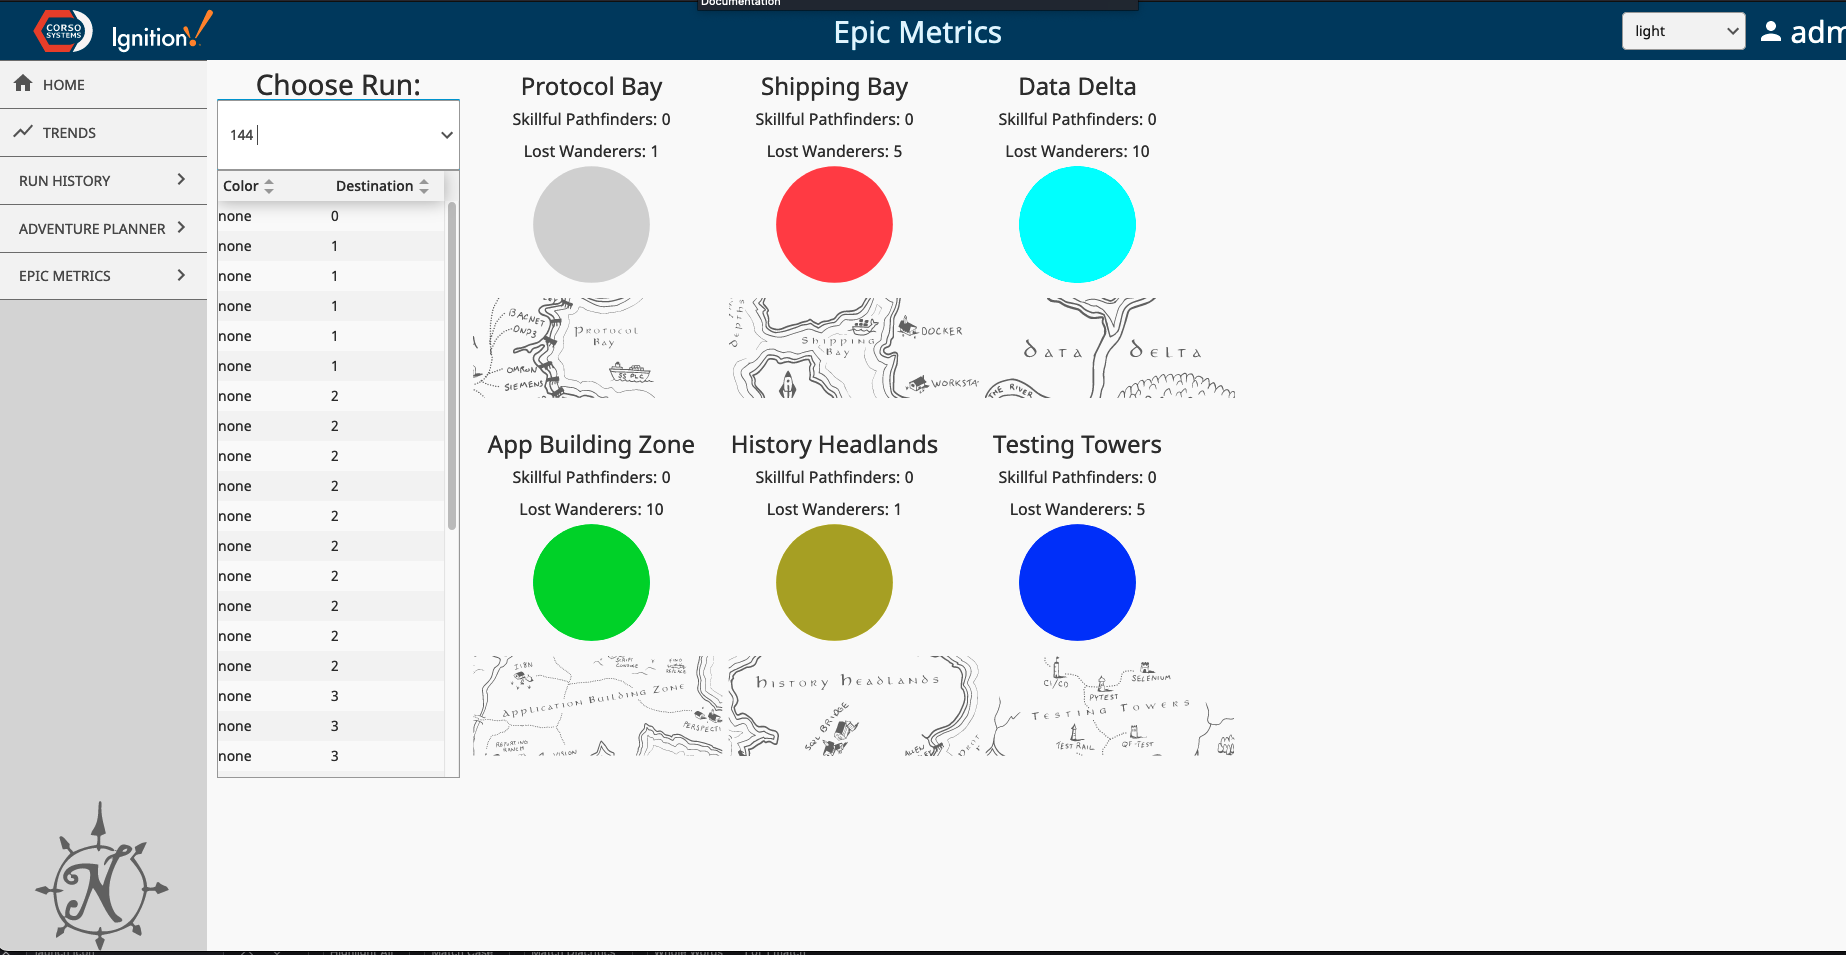
Marguerite immediately listed out the screens we would need, as well as what was needed on those screens—visually, but also from a data (and database table) standpoint. This included tables for storing tag history as well as information about individual runs. Marguerite also explained how it would be useful to keep static information (such as lists of paths and destinations) in tables for quick and easy reference across any of our displayed tables or dropdown menus.
We knew right away that we needed to have a Live Status page, and I wanted to make sure we had at least a few custom SVGs on it. So, I made sure to get those SVGs drawn and their views working before Inductive Automation needed me on Monday for the video interview and then the rehearsal at the Harris Center later in the afternoon. Thankfully, I was able to make the basic shape pretty quickly in Illustrator. Then I set up the basic parameterized view, nested and stacked them in Flex Containers to mimic the Galton Board layout at least closely enough before handing it off.
William and Margurite were already digging in and building path-making and scheduling screens—along with all the logic behind it to make it work.
By the time I returned, they’d gotten so much done that I basically needed the entire ride back from Inductive Automation HQ to get caught up! Marguerite had created the sequence screen, complete with all of its conditional logic and interactivity, and William had been working on the sequencing logic and control itself. They’d also built a number of other screens and were implementing Ad Hoc trends.
Over dinner, we discussed strategies for how to get everything completed on Tuesday, which was beginning to seem like a very short amount of time!
Tuesday: Now or Never!

Tuesday was crunch time. We were passing views and screens back and forth as quickly as we could. Since the Galton boards were pretty loud in the conference rooms, we’d taken to warning each other before firing it off for testing. Through the day, Terry from Opto 22 was near and making sure both teams’ Opto 22 setups were running strong. With so many moving parts—and many of them 3d printed—there were a only a couple of very small repairs necessary even though we were running the board quite a bit. We needed to keep running the board to collect data as well as to make sure the sequences worked—along with the sequencing page, our “Adventure Planner”. Terry only needed to swap out a few parts and to gently file/sand a part that was getting stuck in the wrong position.
We also continued building out the “story” aspect of our project along with making sure we were still meeting the technical requirements of the competition. We continued adding features and design elements right until the absolute last second. Both teams agreed on a time extension, so we made sure to use it all. We even kept adding extra Ad Hoc trend features and additional design elements through the final half hour!
Day 3: ICC Elevate Conference and Creating the Presentation

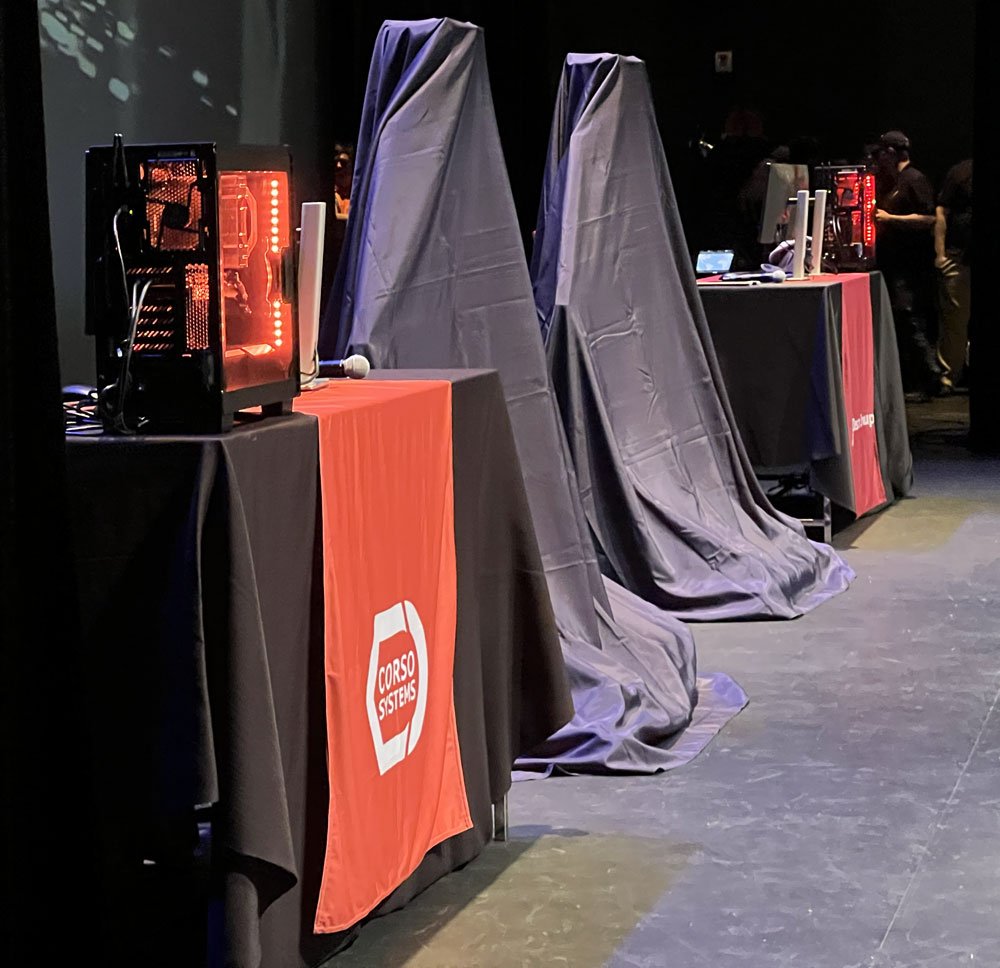
As this 360 photo near the Opto 22 booth proves, the ICC conference was very well attended
Since the build portion of the competition was officially over (and we could only look at the project to write and prepare our presentation) our team took a little bit of a break for the first half of the day to get our badges, hear the ICC Elevate keynote, and connect with the rest of our coworkers and friends at the conference itself. We also planned to attend a few of the talks, check out the Data Dash, visit sponsor booths and more.
In the afternoon, we took to our hotel’s conference room to discuss the details of our project, and what to include in our presentation (while including each project requirement) before joining our coworkers for dinner and a little bit of board game fun.
Following the evening’s activities, I wrote up the presentation, read it through several times—and I promise, tested it for time. I also wrote it in such a way that one of my teammates could “drive” the visuals of the project to accompany what I was saying—provided they could hear me in the auditorium. Of course, I wrote too much, but our team had created so many cool features, it was hard to cut it down!
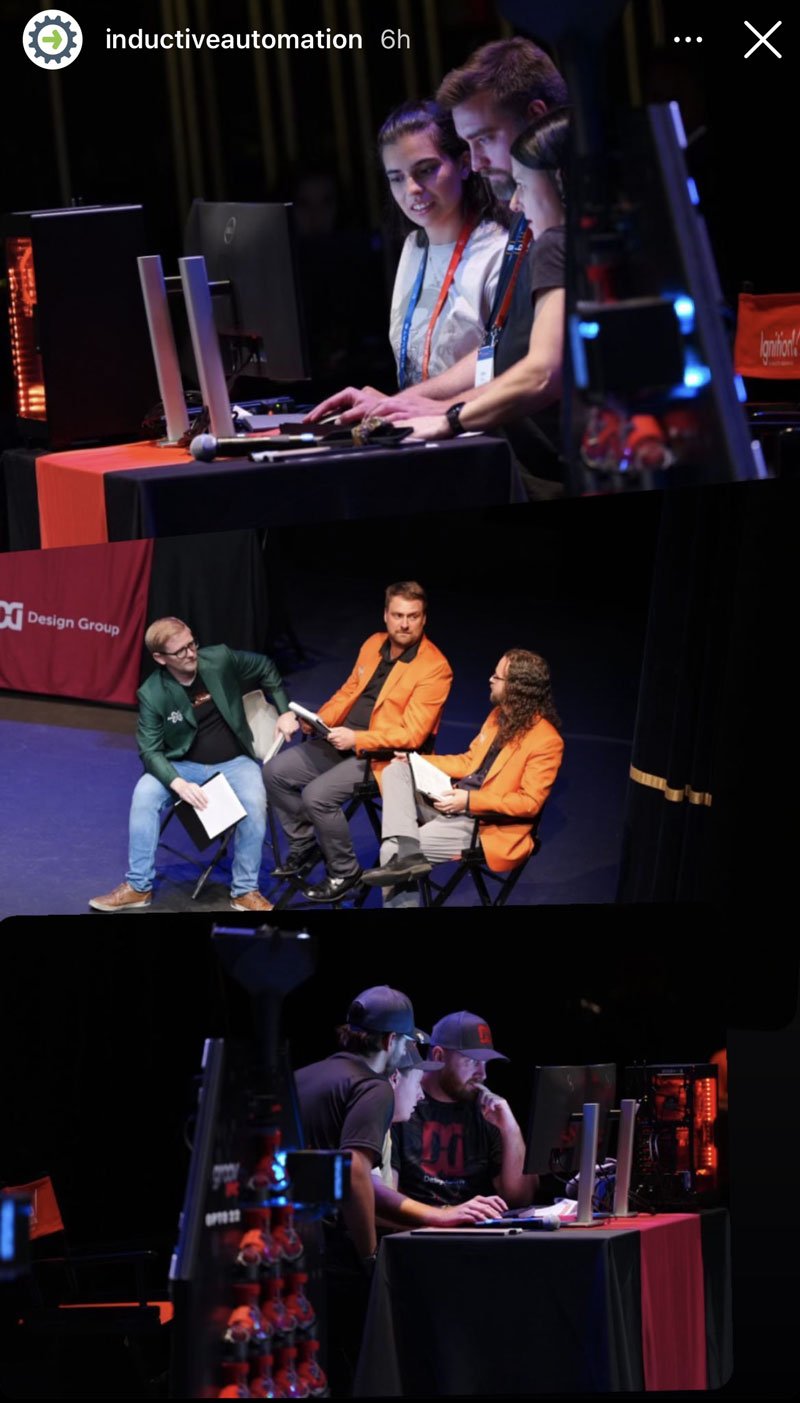
Day 4, Build-a-Thon on Stage: a Curveball and a Presentation
We reviewed the presentation the next day for technical accuracy—and to make sure everyone on the team liked it. After some corrections and additions, we practiced the “built in” cues for navigating the project. Since the final Build-a-Thon event would be the last part of the day, we tried to preserve our energy as much as possible.
Thankfully, Inductive Automation let both teams know about “The Curveball” ahead of our time on stage, so we could make sure we understood what needed to be done and ask questions. Essentially, we needed to create a UDT model and Perspective template to contribute to the Community-Powered Sparkplug Data Dash Project. We quickly figured out a basic strategy to implement it as quickly as possible on stage. It was also cool to realize that we were in a great position to implement it since we’d used parameterized views to build our Live Overview page.
We simply created a new view with some modifications to add to the Data Dash along with one of the UDTs that we’d created in the course of building our project. Our object oriented approach to building our project with Flex Containers meant our Perspective View for the Curveball was quick to create and would look nice on any audience member’s phone if they chose to view it to observe the real time data.
While we’d love to show you the entire presentation and the details of our project here, we’ll save that for when Inductive Automation releases the Build-a-Thon Video and both teams’ projects on the Ignition Exchange.

Here are some of the final statements in our presentation that I also wanted to share here. While they’re not especially technical, I think they reveal the true power of Ignition.
To build this project we leveraged power of the Ignition Perspective module essentially out of the box. We spent the majority of our development time working right in the Designer itself. The basis of this project is the Perspective Menu Nav template. This gave us attractive navigation and a basic page structure to start with right away. We even kept many of our color choices on default settings so that we could toggle between light and dark color themes and have everything stay usable and attractive.

These powerful built-in features let us focus on the technical aspects of our project like scripting, queries, perspective view templates with custom SVG graphic gates, and more—with minimal distraction.

We were able to focus on unique customizations without reinventing the wheel. Ignition Perspective helped us make all this happen in a tiny amount of time with UDTs and parameterized templates. We started with a Gateway and a Database.
Ignition is not just a tool for automation projects, it has the potential to expand the workforce in automation. Its combination of powerful functionality and user friendly design bring advanced project development within the grasp of more and more people.
Watch the ICC Build-a-Thon Conclusion on Stage!
Are you ready to put the power of Corso Systems and Ignition to work at your facility? Reach out to our head of sales, Cody Johnson to get started today.