Ignition Perspective Drawing Tool
One of the most commonly requested features in Ignition 8.3 was the Perspective Drawing Tool. Since Perspective is a web-based visualization framework, supporting Scalable Vector Graphics (SVGs) was one of the initial features launched with the platform back in 2019.
SVGs are nice because you can create an image that is infinitely scalable in size without losing any resolution, and it doesn't become pixelated like a standard JPG or PNG image can.
Why the Perspective Drawing Tool Beats Your Current Workflow
To be quite honest, being able to simply edit SVGs in Perspective didn't seem like a super useful feature, and in our opinion, it certainly didn't warrant the amount of questions about such a tool since Perspective was originally released. We're used to having multiple programs open at any given time, especially image editing software for standard PNG images and even SVGs.
That said, the major complaint everyone on our team had with SVGs in Perspective was that for anything even remotely complex where you might want to bind the color of a line or the fill color of an object, it was a complicated process. It required either putting multiple SVG files in a Perspective View to bind what you needed or digging into the SVG in the properties panel to find the right portion of the image to map the binding you needed. Not to mention, your View structure in the tree could quickly become littered with individual SVG items to get to the level of granularity you needed to bind everything.
Using the Perspective Drawing Tool, your View Tree will have a single item for the entire SVG, and you can create/edit your SVG in the drawing tool to your heart's content.

In addition, the Perspective Drawing Tool gives you the ability to bind whatever you need in the SVG itself, with all of the various components listed in the tool, making it easy to see what you are working with in real-time.
Finally, the Perspective Drawing Tool works with any existing SVG images you already have in your project, so there is no additional work to take advantage of all the functionality other than installing Ignition 8.3!
Perspective Drawing Tool Walkthrough
The first step in using the Perspective Drawing Tool is to drag a Drawing Component onto your view from the Perspective Components Palette.

NOTE: If you have an existing SVG not currently in your Perspective project you want to edit you need to add the drawing component, open up the editor, then drag the SVG file from your file system into the drawing canvas.
To export an SVG file, as of the time of this writing, the easiest way is to open your view in a web browser, open the developer tools and navigate down to the SVG in the page, copy the <svg> element, then paste this into a text file, saving it with the file extension “.svg”.
Perspective Drawing Tool Editor
This will put a blank square on your view, which represents the initial SVG, and you can double-click the square to open the drawing tool itself.
Once you have the tool open, you have the typical SVG drawing tools on the left for lines, shapes, text, gradients, etc., along with a "Design" tab and a "Settings" tab. On the bottom right, you'll see the elements in your SVG. For the purposes of this post, we are using the polygon tool to create a hexagon in the SVG:
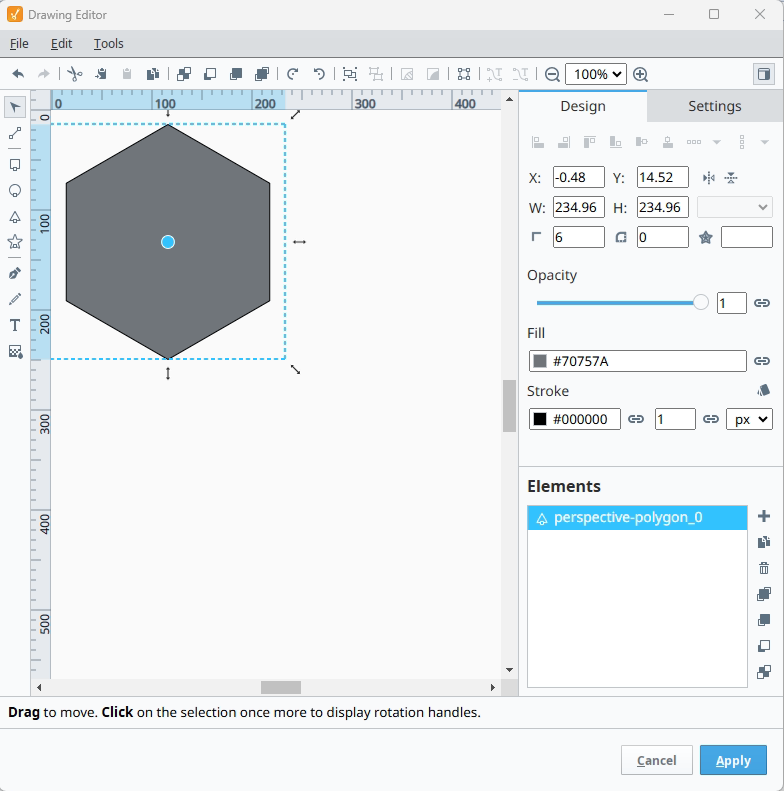
You’ll see the item populate in the “Elements” section on the bottom right along with the various values for position, size, and colors up above in the Design tab.
You can also click the “Settings” tab to see specific information about the SVG, set up bounds around the image, and resizing properties so the SVG will automatically scale with your Perspective View or the drawing dimensions on your view.
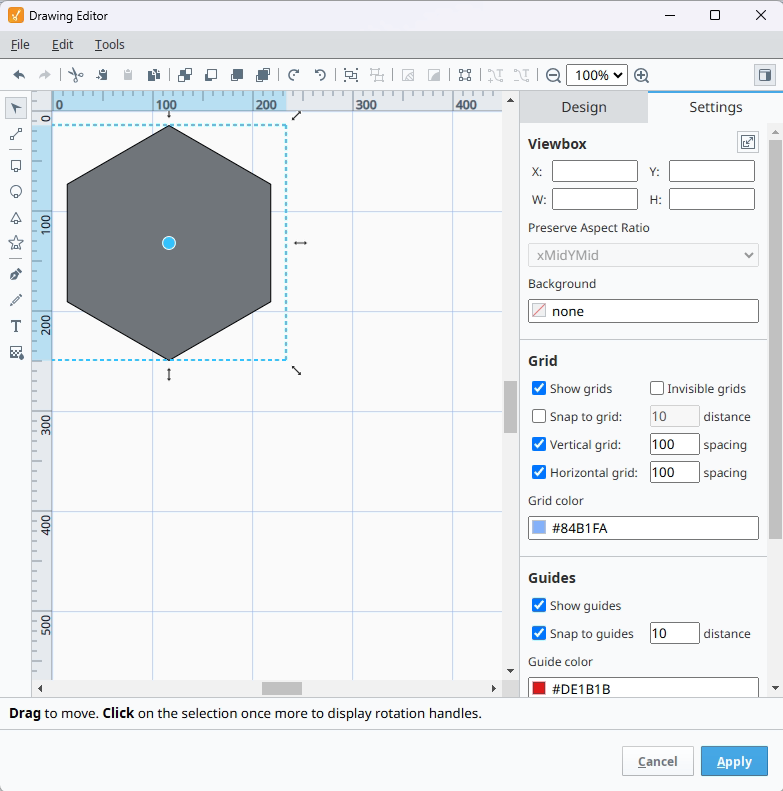
You can play with the Viewbox settings here and see how they work on your Perspective View with the various Preserve Aspect Ratio settings. Here you can also set up grids, guides, and snap behavior for the drawing canvas, as shown in the screenshot above for reference.
In the Drawing Tool, you can also embed text and bind the value of the field to anything you want. As of the time of this writing, the text alignment options leave a little to be desired, so you may want to use labels on your view stacked on top of the SVG if you want more fine control over text size, wrapping, alignment, etc., since not all of the text properties are able to be bound at the moment, and there isn't an alignment option, at least in Ignition 8.3.

Binding SVG Elements in the Perspective Drawing Tool Editor
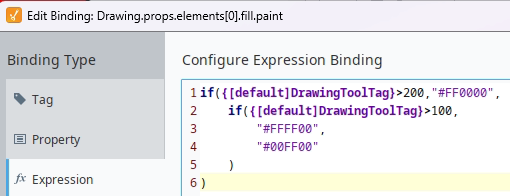
For this post we will bind a value from a tag to the fill color of our hexagon.

To accomplish this click the familiar binding chain icon next to the fill color to open up the standard binding definition window.
We will enter a basic if statement to set the color to green, yellow, or red based on the tag’s value:
As of the time of this writing you might run into a bug where editing the binding requires a designer restart. We did when writing this post, so you may want to make sure your binding works as expected before copying it in for an SVG element. If you go to edit the binding and the window pops up blank, save your project and re-open the Designer and you will be able to edit the binding.
SVGs in Perspective Views
We can now see the bound value in action on our view! A value of less than 100 on our tag will show up as green, 100-200 will be yellow, and greater than 200 will be red:
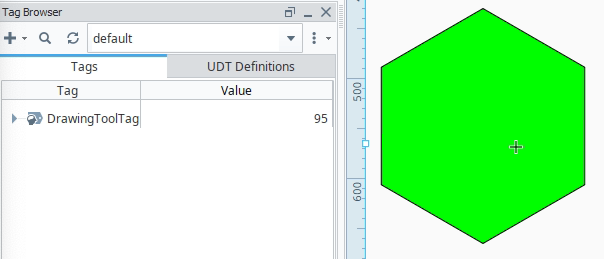

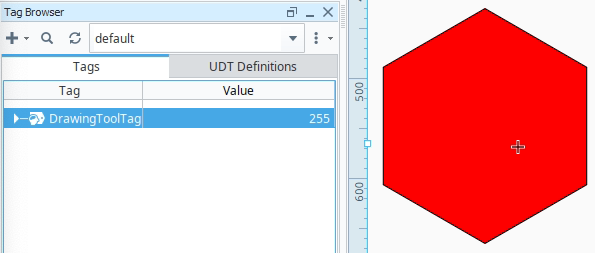
You will also see the entire SVG in your View as a single object:

Wrapping Up
The Perspective Drawing Tool is a powerful addition to Ignition 8.3 and will absolutely make your life easier working with SVGs in Perspective.
The ability to bind individual SVG components directly in the tool is light years ahead of the old workflow, and not having to create multiple images to build a complex graphic keeps your project tree nice and clean!
If you have more questions about the Perspective Drawing Tool or think there is another feature we should add to this post please reach out and let us know!