Database Table Integration in Opto 22 groov View
Out of the box, Opto 22’s groov View platform doesn’t have a table component. And while many of the use cases for using groov View in a small scale application wouldn’t require using tables for controlling equipment, sometimes you will need to integrate with a database and display relevant information to a user.
Luckily, with the extensive integration possibilities from combining groov View with Node-RED, we can get tables working in groov View without much headache.
Building Tables in groov View
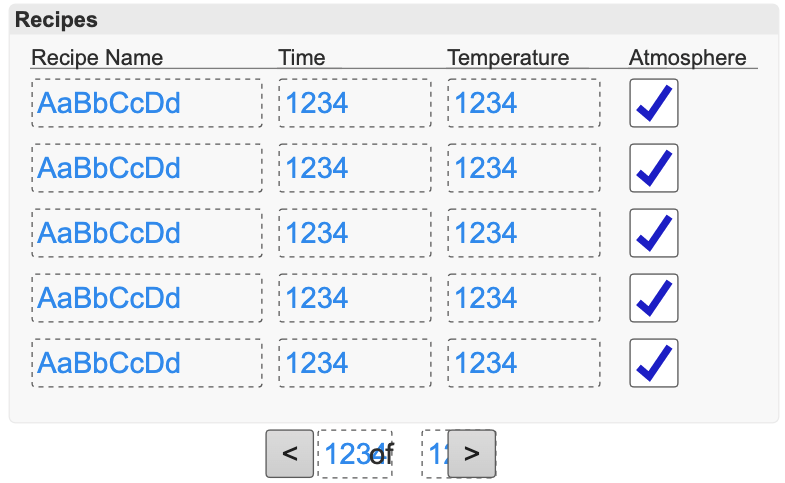
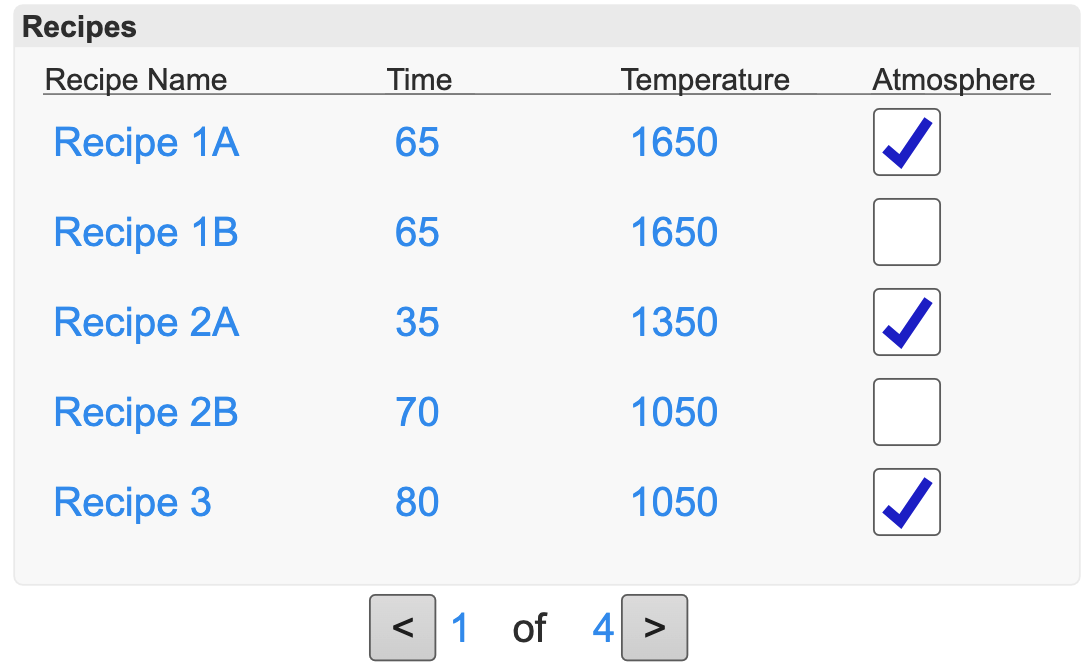
As shown above, we can build out a “table” in groov View. It will look okay to the user, but on the backend it is simply a grouping of various components. In this case we have a group header, some line headers, and a grid of value fields and checkboxes. At the bottom, we have some more value fields with buttons to handle moving between different “pages” of results.
For ease of use, we used five rows in our example table. So, if we have 16 rows in the database, the operator will be able to pull up three pages of five results and a single page of one result. We will also keep track of the current page they are on along with the total number of pages.

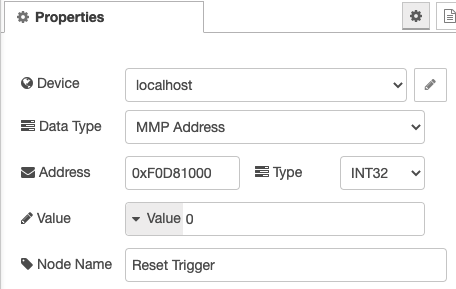
To manage pagination we are going to create some additional tags in our MMP area in the PLC. As we are building up to a full blown recipe management system, review our previous post in the series for more information on what already exists.
In this post, we will add the LowPage, HighPage, TotalPages, ChangePage, and CurrentPage tags, with the relevant addresses shown above.
We will use the buttons to trigger ChangePage with a value of -1 to go down a page, and 1 to go up a page. This value will be set using the buttons below the table. We will track CurrentPage to show what page the user is on, TotalPages for the total number of pages available, and HighPage/LowPage will be used in Node-RED to aid in querying the database.
To manage the data in the table itself, we created a handful of data store tags in groov View using the Table Length property to turn them into arrays. In Node-RED we will build up objects to write back to these tags based on the values in the database.
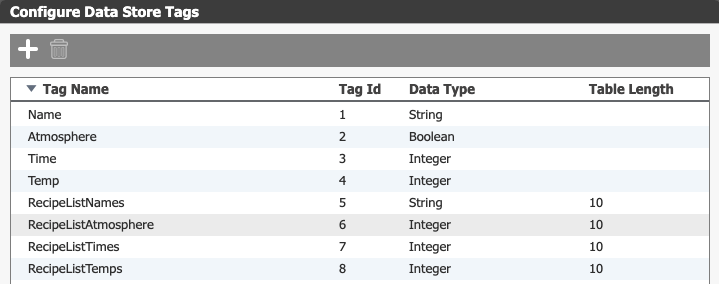
Each of the fields in the table above is mapped to one of the table tags. Using the “Array element” property on the gadget configuration pane we tell groov View what index to use in the array. We are mapping it from 0-4 for the 5 total rows, and write values to those indices in Node-RED.
Getting Data Using Node-RED
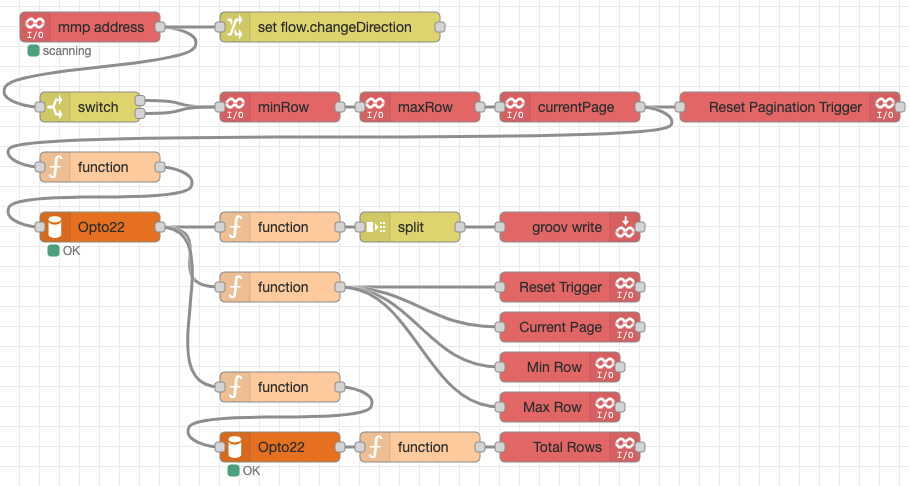
The Node-RED flow above is relatively simple, but it’s squished down to fit into a reasonable screenshot.
At the beginning, we are polling the mmp address for the ChangePage tag. We set a flow variable and pass that through a switch statement. The switch statement isn’t strictly necessary but will allow us to do things like add in “first” and “last” page functionality if we want to.
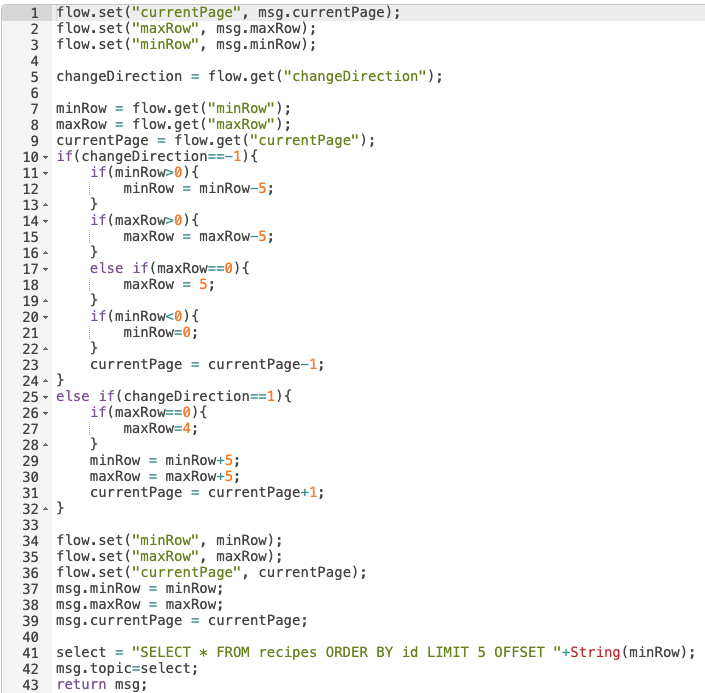
Through the switch, we read in a handful of variables, reset the trigger, then go into a function. This first function will handle checking which page we are on, updating variables, then querying the database to get the results for the current page.
Once this function executes and hits the database, we will split off into three additional functions. The bottom branch in the flow sets up another function to query the total number of rows in the table, then the next function on that branch parses this data before writing it to the TotalPages variable in the PLC.


The middle branch of the flow is for general housekeeping. It grabs the current values for the relevant tags, then writes them back to the PLC so we can track the page we are on.

These values are then written to the PLC to update the current values using groov Write nodes.
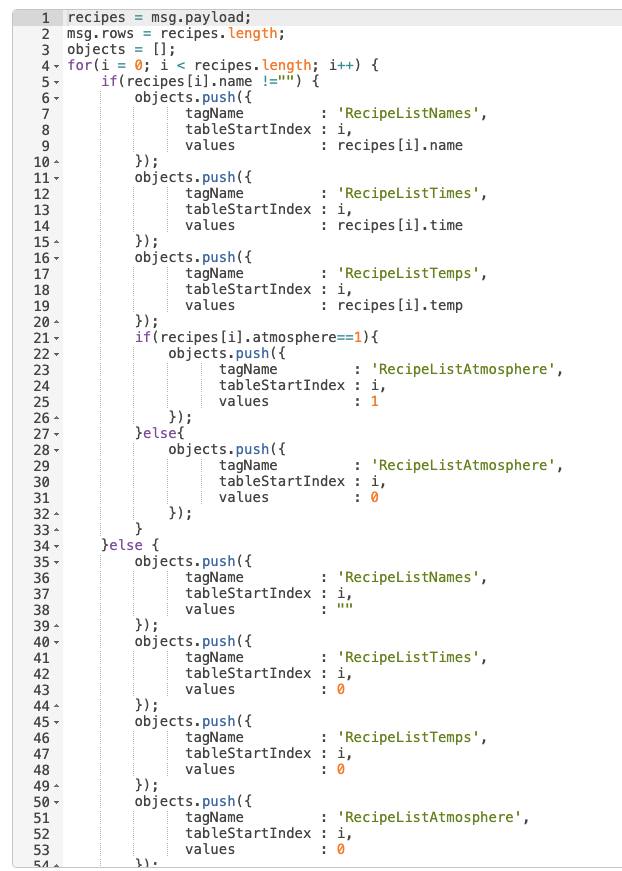
The top branch is the most complicated. Here we parse the data from the database results and then build up an object to write to the PLC data stores for these tags.
First, we loop through all of the records to determine if there is a value stored or not. If we detect a value, we push it into our object. If not, we zero it out. Then, we populate the tagName property so we can write to the tags in bulk. By building an array, we can populate the table variables and automatically update our table view.
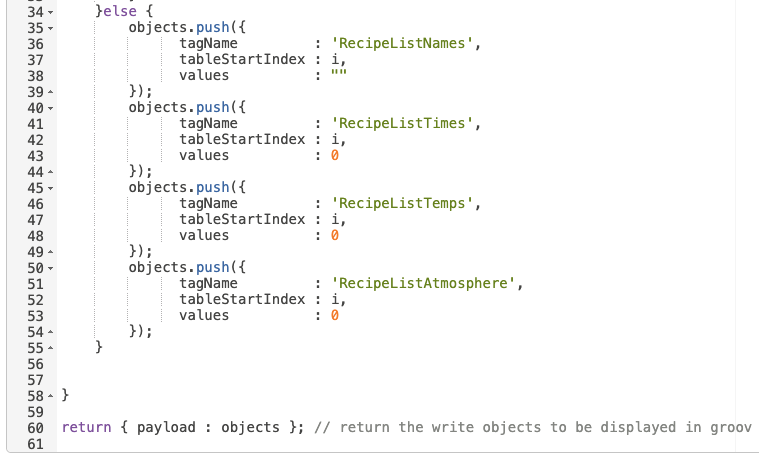
After this function, we use a groov Write to write this value back to the PLC and update our table in real-time.

Swipe Right with Pagination
Here is our completed table in groov View’s View Mode with the first two pages (ten records total) shown on the screen.

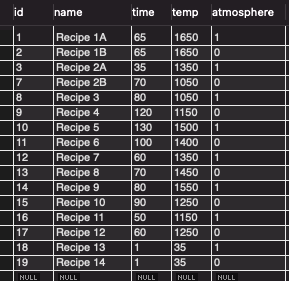
For reference, here is the relevant data in the database table.
Since we are using MySQL for this project, we can use the built in LIMIT and OFFSET functionality in our query.

To make sure everything comes back in the same order every time, we are ordering by the id column. This is an auto incrementing primary key column, so it will be unique for every row. It will also be in the same order as the recipes were created. If necessary, we could adjust it to pull the recipes in in alphabetical order for example.
Once they are in order, we apply the LIMIT clause which will limit us to five records in this example. If we wanted to see ten rows we could make this a value of ten instead.
The real magic comes in with the OFFSET clause. By tracking the minimum row we are pulling from the PLC, we can update this to change the records we retrieve. Starting at OFFSET 0, we would pull in the first five records. If we make the OFFSET value 5, we will pull in the next 5, then 10, 15, and so on.
If we increment this value, we will pull in later records in the sort order. If we decrement it, we will pull in earlier records in the sort order.
This gives us a great deal of power for pulling in data into groov View even though this functionality isn’t built-in.
Wrapping Up
With this second post, we are continuing to build up to our full recipe integration post with a couple of detours along the way. It’s important to spend time on these concepts in detail without making the full post 37 pages long!
This type of functionality is very useful in many SCADA applications, and tools like Node-RED make this a very powerful option for groov View.
Understanding how to leverage tools like Node-RED as part of a holistic SCADA solution will also open your eyes to how you can leverage them with Ignition Edge to really give your technology an edge when integrating your process with your business systems.